We want to get the most out of every slit-lamp examination. You can’t diagnose or treat a problem with your therapeutic skills if you can’t identify it!
-
Filters, filters, filters!
We use filters in our social media lives to highlight detail and make things really ‘pop’.
The neutral density filter is a drastically underused part of the slit lamp. Without its use, finer detail can be missed. The neutral density filter (symbol is usually circle with hashed lines) modifies all wavelengths of light and avoids under and overexposure. In image A, the blood vessels of the conjunctiva cannot be seen due to overexposure; in image B, the addition of a neutral density filter enables the conjunctival blood vessels to be visualised.

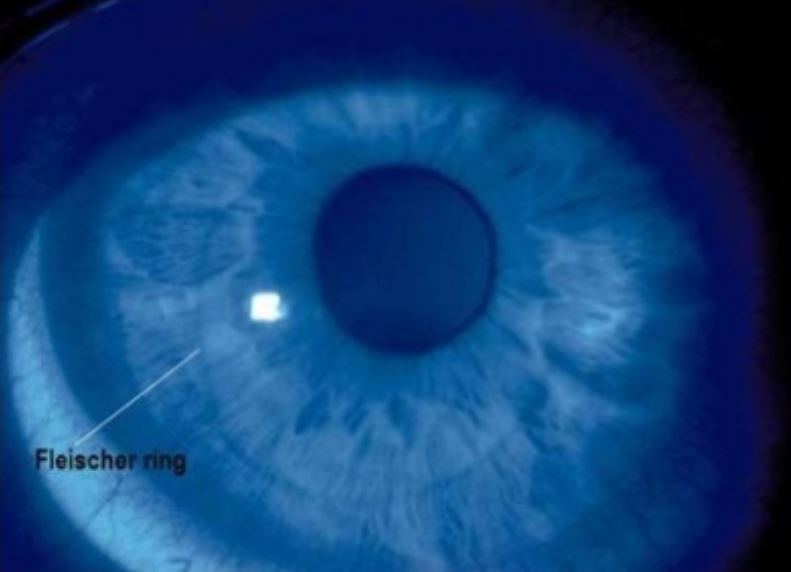
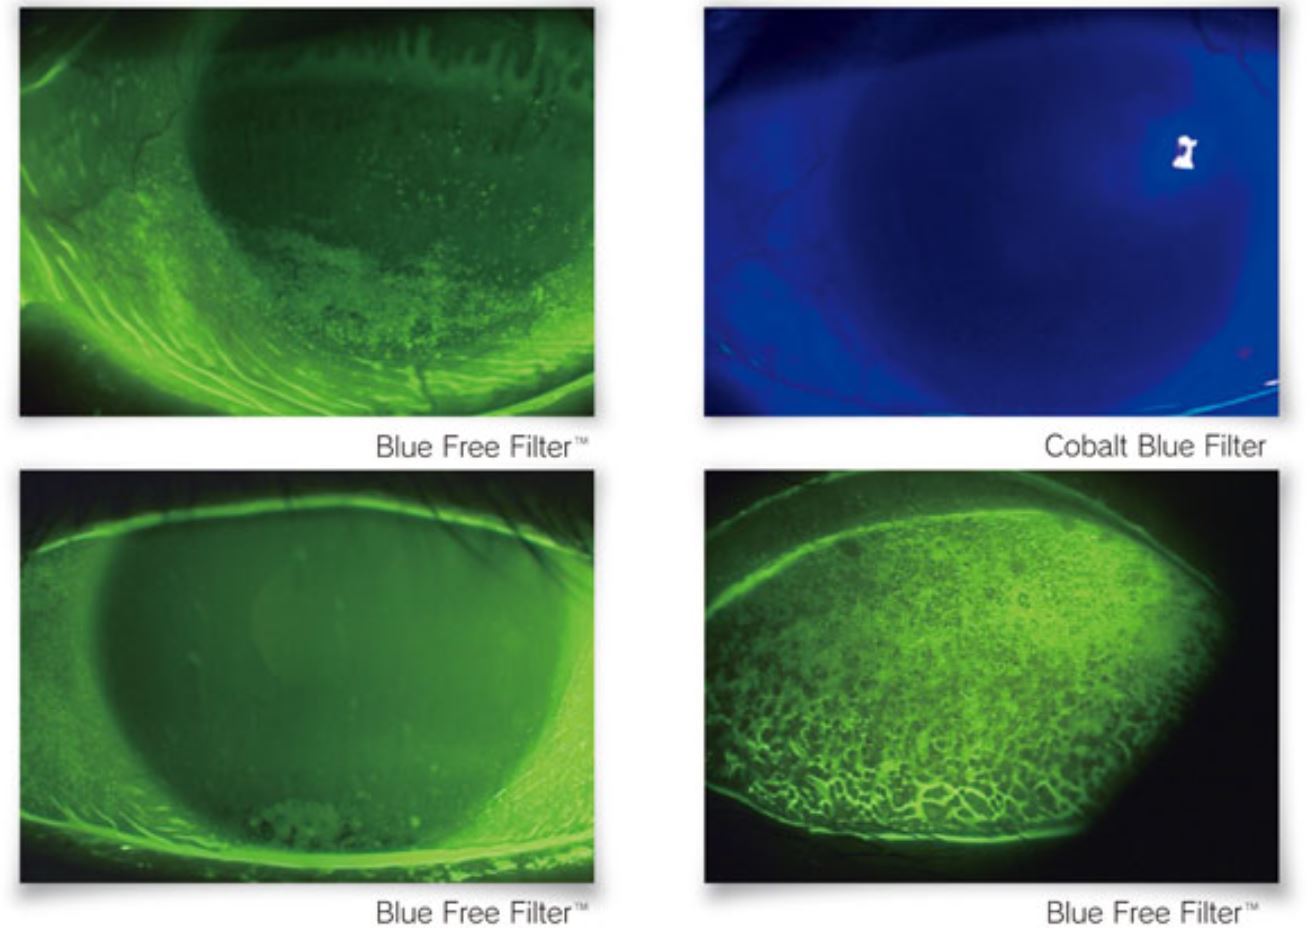
We all know the benefit of the red free (green) filter for posterior eye examination - it allows us to visualise RNFL defects and pigmented lesions of the retina. The red-free filter obscures anything red so blood vessels and haemmorhages appear black. In the anterior eye, it can be used to highlight the path and pattern of inflamed blood vessels. It is also great for highlighting the presence of a Fleischer ring.
The Wratten filter bolsters contrast when used with the cobalt blue filter. Most slit-lamps have a Wratten filter built in so remember to flip it on when you use the cobalt blue filter. It make examination with fluorescein much simpler.
2. The Basics: Alignment and PD
There is a human on the other side of the slit-lamp. Make sure the patient is aligned well with the canthus mark with their forehead resting on the plastic band and chair at a comfortable height. Make sure you’re also comfortable with your alignment with the oculars and the PD adjusted accordingly to ensure a stereoscopic view. Never duck or tilt your head - remember your personal ergonomics also. Rest your elbow on your lens case or foam discs for comfort when you’re using your diagnostic lenses.
3. Turn up the rheostat!
The anterior chamber and the anterior vitreous is very tricky to visualise without adjusting the brightness. Turn up the light when examining these structures. A stray cell or anterior vitreous detachment is easily missed if the brightness of the slit-lamp is too low. While amping up the intensity of the light may improve your ability to see, it will be uncomfortable for the patient. If you must increase the intensity of the light, let your patient know and keep it as brief as possible. The general rule of thumb is to lower the beam width and/or height as you increase the brightness of the slit lamp.

